Extensive Guide For Belkin Range Extender Reset
Resetting a device is always a need and not a choice. So when it comes to resetting a wifi range extender it is because of issues or glitches in its smooth working. In this blog, our focus will be on the Belkin Wifi Range Extender Reset process. Though Belkin wifi range extender does its job pretty well, it extends the signal to hopeless network zones and enhances the internet speed to 300 Mbps. But, there are times when it might react or stop working. In this scenario, you need to reset your Belkin wifi range extender and redo its configuration settings. Follow the blog to know everything in detail.
Detailed Guide For Belkin Wifi Range Extender Reset:
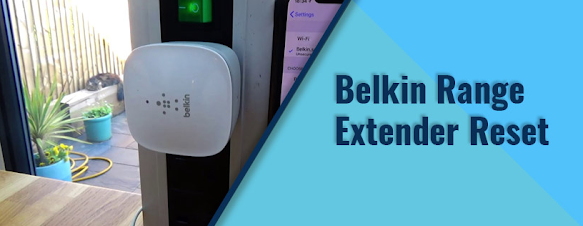
In case you have lost the login information for your Belkin wifi range extender then you need to reset the device to get the default settings back. For this, firstly try to find a tiny round button on the rear of your extender. These are the specifications of the Belkin wifi range extender reset button. Now, take any pointed object like a pin, pen, or pencil to press the reset button as it can’t be pressed with your fingers. You must hold the reset button after pressing it for around 10-15 seconds and then see if all the LED light indicators are flashing or not. After pressing the reset button for 10-15 seconds, release it and then reboot your Belkin wifi extender. Now, you must let your Belkin wifi range extender be idle for at least 60 seconds to let it restart efficiently and then restore the default factory settings. Once your Belkin wifi range extender is fully reset you can set it up for configuration. Install your Belkin wifi extender using the usual method and then set it up. Check the sticker label at the bottom of the wifi extender and get the default username and password from there. You can also check the box of the wifi router in case there is no sticker on the extender.
Detailed Guide For Setting Up Belkin Wifi Range Extender:
When you reset a device, it goes back to its original settings that means the settings that came when you purchased the device. So this calls for a new setup and for that here is your guide. To start with the setup procedure, first, plug the Belkin wifi range extender into an AC socket and turn on your PC device. After turning on both the Belkin wifi range extender and the PC device visit the wifi settings in your device’s main settings. Here, you will come across the network name or the SSID of the wifi extender. Tap on the SSID to link your PC device to its network. Now open your default internet browser and you will be automatically taken to the Belkin wifi range extender setup web page. After that, follow the instructions on your screen and select your wifi router’s SSID and enter the password. Click on the Next button to proceed with the setup. Once you have completed the configuration settings of your Belkin wifi range extender, relocate it to any area in the house and get the extended signals in every nook and corner.
Belkin Range Extender Reset Is Your Solution!
Now you know how to do Belkin range extender reset, so you can overcome any obstacle that comes on this front. Most importantly, if you face a login issue with your wifi extender then resetting the device is your best bet. You can work with the default login credentials to get into your wifi extender’s admin panel and configure the settings accordingly.
Comments
Post a Comment